# Linux Setup for Viromics on Ubuntu {#sec-linux-setup}
Think of this chapter as preparing your **viromics laboratory bench**. In a wet lab you would never pour RNA extraction, DNA extraction, PCR, and sequencing reagents into one messy box — each protocol needs its own clean space and its own reagents. Bioinformatics is the same. Many viral tools depend on different versions of Python, R, HMMER, DIAMOND, or TensorFlow, and databases that assume specific layouts.
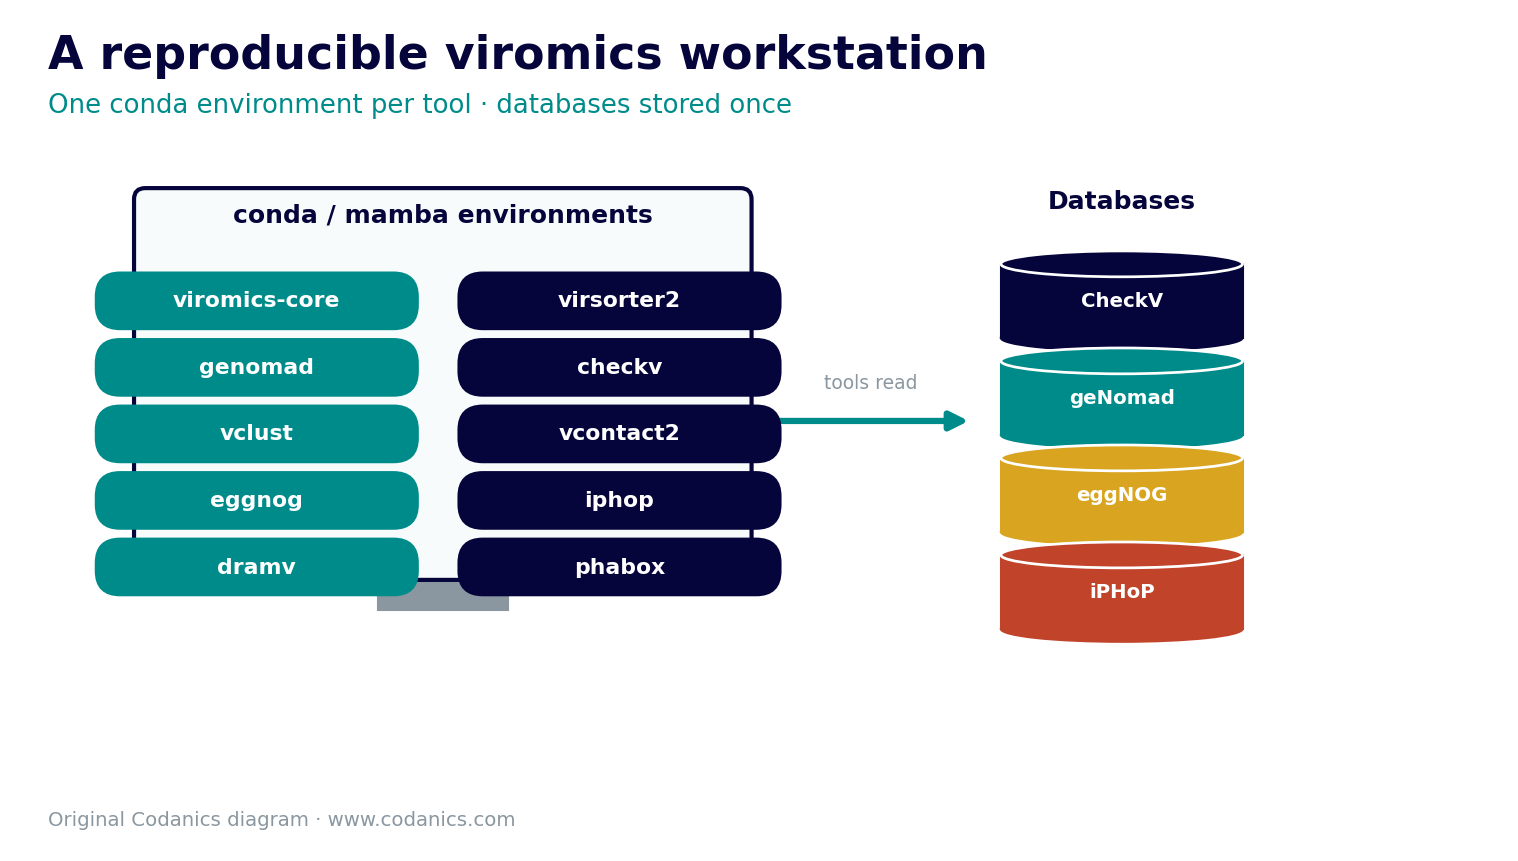
> **The rule for this book: one clean core environment, then a separate environment per complex viral tool.**
Installing everything into `base` is the fastest way to spend days untangling dependency conflicts. Bioconda recommends the `bioconda` and `conda-forge` channels with strict channel priority, and Miniforge is the lightweight, conda-forge-based installer that replaced Mambaforge for Ubuntu workstations.
::: {.chapter-goals}
**Learning objectives** — by the end of this chapter you will be able to:
- install Miniforge and configure Bioconda channels with strict priority;
- explain why viromics tools live in separate conda environments and design that layout;
- build a reproducible project folder structure and set the shared environment variables the book relies on;
- install and version-check the full viromics toolchain, from QC and assembly to host prediction; and
- set up the tool databases (VirSorter2, geNomad, CheckV, DRAM, eggNOG, iPHoP) and verify the whole install with one script.
:::
## Recommended computer resources
Viromics is disk- and memory-hungry, mostly because of the reference databases.
| Component | Minimum | Better |
|---|---|---|
| RAM | 16 GB | 32–64 GB |
| CPU | 4 cores | 8–32 cores |
| Disk | 200 GB | 1–2 TB |
| OS | Ubuntu 22.04 / 24.04 | Ubuntu server / HPC |
| Internet | Stable | Very stable |
Full databases need much more disk. Some tools — **iPHoP**, **DRAM**, and large host databases — can each require hundreds of GB. On a modest laptop you can try the commands; run them for real on a workstation, server, or HPC.
## System preparation
Update the base system and install compilers and common utilities.
```bash
sudo apt update
sudo apt upgrade -y
sudo apt install -y \
  build-essential wget curl git unzip zip tar gzip pigz tree htop \
  nano vim cmake make gcc g++ default-jre default-jdk
```
Check versions.
```bash
gcc --version
g++ --version
java -version
git --version
```
## Install Miniforge
Skip this section only if you already have a working conda/mamba installation.
```bash
cd ~

wget https://github.com/conda-forge/miniforge/releases/latest/download/Miniforge3-Linux-x86_64.sh \
  -O Miniforge3-Linux-x86_64.sh

bash Miniforge3-Linux-x86_64.sh
source ~/.bashrc
```
During installation accept the license (`yes`), keep the default path, and answer `yes` to initialize conda. Then confirm and update the base tools.
```bash
conda --version
mamba --version
mamba update -n base -c conda-forge conda mamba -y
```
Configure channels with strict priority.
```bash
conda config --add channels bioconda
conda config --add channels conda-forge
conda config --set channel_priority strict
conda config --show channels
```
## Project folder structure
```bash
mkdir -p ~/viromics_course
cd ~/viromics_course

mkdir -p raw_reads trimmed_reads qc_reports assemblies assembly_qc \
  viral_identification checkv votus taxonomy annotation abundance \
  host_prediction phylogeny diversity visualization metadata databases \
  logs scripts env_yamls code images

tree -L 1 ~/viromics_course
```
Set the shared paths and thread count once, in your shell profile, so every later command can reuse them.
```bash
cat >> ~/.bashrc << 'EOF'

# Viromics course paths
export VIROME=$HOME/viromics_course
export VIROME_DB=$HOME/viromics_course/databases
export THREADS=12
EOF

source ~/.bashrc
echo "$VIROME | $VIROME_DB | $THREADS"
```
## Environment strategy
This looks like many environments, but it is professional practice: it stops one tool from breaking another and makes every step reproducible.
| Environment | Purpose |
|---|---|
| `viromics-core` | QC, trimming, assembly, mapping, general utilities, R/Python visualization |
| `virsorter2` | Virus identification |
| `genomad` | Virus/plasmid identification and taxonomy |
| `checkv` | Viral genome quality and completeness |
| `virfinder` | R-based viral prediction |
| `deepvirfinder` | Deep-learning viral prediction |
| `vclust` | ANI-based viral clustering and vOTUs |
| `cd-hit` | Fast sequence clustering / dereplication |
| `vcontact2` | Gene-sharing network taxonomy |
| `vibrant` | Viral identification and functional annotation |
| `dramv` | DRAM-v viral functional annotation |
| `eggnog` | eggNOG functional annotation |
| `iphop` | Host prediction |
| `phabox` | PhaGCN/PhaBOX taxonomy, host, and lifestyle tools |
| `wish` | WIsH host prediction from viral contigs |
## Fast path: create environments from files
If you would rather not type every `mamba create` command, ready-made
`environment.yml` files are provided for the most important environments. Create
each one with a single command (databases are still downloaded separately, as
shown in the tool sections below).
```{=html}
<div class="dl-row">
<a class="dl-btn" href="../envs/viromics-core.yml" download>⬇ viromics-core.yml</a>
<a class="dl-btn secondary" href="../envs/virsorter2.yml" download>⬇ virsorter2.yml</a>
<a class="dl-btn secondary" href="../envs/genomad.yml" download>⬇ genomad.yml</a>
<a class="dl-btn secondary" href="../envs/checkv.yml" download>⬇ checkv.yml</a>
<a class="dl-btn secondary" href="../envs/eggnog.yml" download>⬇ eggnog.yml</a>
</div>
```
```bash
conda env create -f envs/viromics-core.yml
conda env create -f envs/virsorter2.yml
conda env create -f envs/genomad.yml
conda env create -f envs/checkv.yml
conda env create -f envs/eggnog.yml
```
The sections below still explain each tool and its database, and cover the extra
environments (VirFinder, DeepVirFinder, vClust, vConTACT2, VIBRANT, DRAM-v, iPHoP,
PhaBOX, WIsH) that you install as you need them.
## Core environment
This environment handles QC, trimming, assembly, mapping, plotting, and general utilities [@shen2016seqkit; @hyatt2010prodigal; @langmead2012bowtie2; @danecek2021samtools].
```bash
mamba create -n viromics-core -y \
  -c conda-forge -c bioconda \
  python=3.11 r-base r-essentials r-tidyverse r-ggplot2 r-pheatmap \
  r-vegan r-ape bioconductor-phyloseq fastqc multiqc fastp trimmomatic \
  megahit spades quast sra-tools seqkit csvtk blast diamond hmmer \
  mmseqs2 prodigal cd-hit mafft iqtree bowtie2 samtools coverm bedtools \
  pandas numpy scipy matplotlib seaborn jupyterlab
```
Activate and check the key tools.
```bash
conda activate viromics-core
fastqc --version
multiqc --version
fastp --version
megahit --version
spades.py --version
quast.py --version
seqkit version
bowtie2 --version | head -n 1
samtools --version | head -n 1
coverm --version
R --version
python --version
```
Save a reproducible copy of the environment. Do this for every environment you build.
```bash
conda env export --no-builds > $VIROME/env_yamls/viromics-core.yml
```
## Viral tool environments
### VirSorter2
VirSorter2 detects diverse DNA and RNA viruses using a multi-classifier approach [@guo2021virsorter2].
```bash
mamba create -n virsorter2 -y -c conda-forge -c bioconda virsorter=2
conda activate virsorter2
virsorter --version

mkdir -p $VIROME_DB/virsorter2
virsorter setup -d $VIROME_DB/virsorter2 -j $THREADS
conda env export --no-builds > $VIROME/env_yamls/virsorter2.yml
```
### geNomad
geNomad identifies viruses and plasmids and provides taxonomy and annotation outputs [@camargo2024genomad].
```bash
mamba create -n genomad -y -c conda-forge -c bioconda genomad
conda activate genomad
genomad --version

mkdir -p $VIROME_DB/genomad
genomad download-database $VIROME_DB/genomad
conda env export --no-builds > $VIROME/env_yamls/genomad.yml
```
### CheckV
CheckV estimates viral contig quality, completeness, and contamination, and trims host flanks from proviruses [@nayfach2021checkv]. The database is downloaded separately, and its folder name varies by version, so locate it and export `CHECKVDB` into your profile.
```bash
mamba create -n checkv -y -c conda-forge -c bioconda checkv
conda activate checkv

mkdir -p $VIROME_DB/checkv
checkv download_database $VIROME_DB/checkv

CHECKV_PATH=$(find $VIROME_DB/checkv -maxdepth 2 -type d -name "checkv-db*" | head -n 1)
ln -sfn "$CHECKV_PATH" $VIROME_DB/checkv-db          # stable path reused across the book
echo 'export CHECKVDB=$VIROME_DB/checkv-db' >> ~/.bashrc
source ~/.bashrc
echo "$CHECKVDB"
conda env export --no-builds > $VIROME/env_yamls/checkv.yml
```
### VirFinder
VirFinder is an R package that scores contigs as viral using k-mer signatures learned from reference genomes [@ren2017virfinder].
```bash
mamba create -n virfinder -y -c conda-forge -c bioconda \
  r-base r-virfinder r-tidyverse
conda activate virfinder

# Load the package and print its version to confirm the install
R -q -e "library(VirFinder); packageVersion('VirFinder')"
conda env export --no-builds > $VIROME/env_yamls/virfinder.yml
```
### DeepVirFinder
DeepVirFinder predicts viral sequences with a deep-learning model and was designed to work well on short contigs [@ren2020deepvirfinder]. It is older and dependency-sensitive, so keep it isolated. Two routes are shown; use the source route when the conda package fails to solve.
Route A — conda package from the HCC channel:
```bash
mamba create -n deepvirfinder -y \
  -c hcc -c conda-forge -c bioconda deepvirfinder
conda activate deepvirfinder
dvf.py -h | head
```
Route B — GitHub source install:
```bash
mamba create -n deepvirfinder-src -y -c conda-forge -c bioconda \
  python=3.6 numpy theano keras scikit-learn biopython
conda activate deepvirfinder-src

mkdir -p $VIROME/software && cd $VIROME/software
git clone https://github.com/jessieren/DeepVirFinder.git
cd DeepVirFinder
python dvf.py -h
conda env export --no-builds > $VIROME/env_yamls/deepvirfinder.yml
```
::: {.callout-note}
## The recommended core method
For modern pipelines, treat **VirSorter2 + geNomad + CheckV** as the core viral-identification stack, then use VirFinder and DeepVirFinder as additional evidence layers rather than standalone verdicts.
:::
### vClust and CD-HIT
vClust calculates average nucleotide identity (ANI) and clusters viral genomes into vOTUs, typically at a 95% ANI threshold [@zielezinski2025vclust]. CD-HIT is already in `viromics-core`, but a dedicated environment keeps its version stable for dereplication [@fu2012cdhit].
```bash
mamba create -n vclust -y -c conda-forge -c bioconda vclust
conda activate vclust
vclust --help | head
conda env export --no-builds > $VIROME/env_yamls/vclust.yml

mamba create -n cd-hit -y -c conda-forge -c bioconda cd-hit
conda activate cd-hit
cd-hit -h | head
cd-hit-est -h | head
conda env export --no-builds > $VIROME/env_yamls/cd-hit.yml
```
### vConTACT2
vConTACT2 classifies prokaryotic viruses using gene-sharing networks; the official install pairs it with `mcl`, `blast`, and `diamond` [@jang2019vcontact2].
```bash
mamba create -n vcontact2 -y -c conda-forge -c bioconda \
  python=3 vcontact2 mcl blast diamond prodigal
conda activate vcontact2
vcontact2 --help | head
conda env export --no-builds > $VIROME/env_yamls/vcontact2.yml
```
### VIBRANT
VIBRANT recovers and annotates bacterial and archaeal viruses from metagenomic assemblies [@kieft2020vibrant]. Its database is prepared with `download-db.sh`.
```bash
mamba create -n vibrant -y -c conda-forge -c bioconda vibrant
conda activate vibrant
VIBRANT_run.py -h | head

mkdir -p $VIROME_DB/vibrant
cd $VIROME_DB/vibrant
download-db.sh
conda env export --no-builds > $VIROME/env_yamls/vibrant.yml
```
### DRAM / DRAM-v
DRAM annotates microbial and viral genomes; DRAM-v is especially useful for viral functional annotation and auxiliary metabolic gene interpretation [@shaffer2020dram]. DRAM ships its own `environment.yaml`, and databases are prepared with `DRAM-setup.py`.
```bash
mkdir -p $VIROME/software && cd $VIROME/software
wget https://raw.githubusercontent.com/WrightonLabCSU/DRAM/master/environment.yaml \
  -O DRAM_environment.yaml

mamba env create -f DRAM_environment.yaml -n dramv
conda activate dramv
DRAM-setup.py --help | head
```
Prepare the databases. On a workstation, add `--skip_uniref`: UniRef90 is enormous and pushes memory far beyond a typical machine, and DRAM works well for viral annotation without it. Then confirm the configuration.
```bash
mkdir -p $VIROME_DB/DRAM_data

DRAM-setup.py prepare_databases \
  --output_dir $VIROME_DB/DRAM_data \
  --skip_uniref \
  --threads $THREADS \
  --verbose

DRAM-setup.py print_config
conda env export --no-builds > $VIROME/env_yamls/dramv.yml
```
::: {.callout-warning}
## DRAM database setup is heavy
Even with `--skip_uniref`, DRAM database preparation is one of the most resource-intensive steps in this book. On a modest laptop, try the commands; run them for real on a workstation, server, or HPC.
:::
### eggNOG-mapper
eggNOG-mapper annotates predicted proteins by orthology [@cantalapiedra2021eggnogmapper]. Define `EGGNOG_DATA_DIR` before downloading, and persist it to your profile so every run finds the same database.
```bash
mamba create -n eggnog -y -c conda-forge -c bioconda eggnog-mapper
conda activate eggnog
emapper.py --version

mkdir -p $VIROME_DB/eggnog
export EGGNOG_DATA_DIR=$VIROME_DB/eggnog
download_eggnog_data.py --data_dir $EGGNOG_DATA_DIR   # answer y when prompted

echo "export EGGNOG_DATA_DIR=$VIROME_DB/eggnog" >> ~/.bashrc
source ~/.bashrc
conda env export --no-builds > $VIROME/env_yamls/eggnog.yml
```
### iPHoP
iPHoP predicts the host genus of uncultivated bacteriophages and archaeal viruses by integrating several host-prediction signals. It is available through Bioconda; the database is large.
```bash
mamba create -n iphop -y -c conda-forge -c bioconda iphop
conda activate iphop
iphop --help | head

mkdir -p $VIROME_DB/iphop
iphop download --db_dir $VIROME_DB/iphop

du -sh $VIROME_DB/iphop
conda env export --no-builds > $VIROME/env_yamls/iphop.yml
```
::: {.callout-warning}
## The iPHoP database is very large
The iPHoP host database runs to hundreds of GB. Confirm you have the disk space before downloading.
:::
### PhaBOX / PhaGCN
PhaGCN moved into PhaBOX 2, which now covers taxonomy classification, host prediction, lifestyle prediction, vOTU grouping, tree building, and viral protein annotation [@shang2026phabox2]. Install from Bioconda first; fall back to source if the package is unavailable or outdated, then download the database.
```bash
mamba create -n phabox -y -c conda-forge -c bioconda phabox
conda activate phabox
phabox2 --help
```
Source install (only if the Bioconda package fails):
```bash
mkdir -p $VIROME/software && cd $VIROME/software
git clone https://github.com/KennthShang/PhaBOX.git
cd PhaBOX
python -m pip install -r requirements.txt
python -m pip install .
```
Download the PhaBOX database:
```bash
mkdir -p $VIROME_DB/phabox
cd $VIROME_DB/phabox
wget https://github.com/KennthShang/PhaBOX/releases/download/v2/phabox_db_v2_2.zip
unzip phabox_db_v2_2.zip
conda env export --no-builds > $VIROME/env_yamls/phabox.yml
```
### WIsH
WIsH predicts prokaryotic hosts of phage contigs using Markov models and is compiled from source [@galiez2017wish]. Build it inside a small environment that provides the compilers, then add the binary to your `PATH`.
```bash
mamba create -n wish -y -c conda-forge -c bioconda \
  cmake make gcc_linux-64 gxx_linux-64
conda activate wish

mkdir -p $VIROME/software && cd $VIROME/software
git clone https://github.com/soedinglab/WIsH.git
cd WIsH
cmake .
make

echo "export PATH=$VIROME/software/WIsH:\$PATH" >> ~/.bashrc
source ~/.bashrc
WIsH -h | head
conda env export --no-builds > $VIROME/env_yamls/wish.yml
```
### CRISPR spacer tools
CRISPR-based host prediction needs only BLAST+, `seqkit`, `bedtools`, and `samtools` — all already in `viromics-core`. Bacterial and archaeal genomes record previous phage encounters as CRISPR spacers, so a high-identity BLAST match between a host spacer and a viral contig is evidence of a host relationship. In the [complete pipeline chapter](04-complete-pipeline.qmd) you will build a spacer database with `makeblastdb` and run a short-word `blastn` search against your viral contigs.
```bash
conda activate viromics-core
blastn -version
makeblastdb -version
seqkit version
bedtools --version
```
## Tool map for the complete pipeline
| Step | Tool | Main input | Main output |
|---|---|---|---|
| Raw data download | SRA Toolkit | SRA accession | FASTQ files |
| QC | FastQC / MultiQC | FASTQ | HTML reports |
| Trimming | fastp / Trimmomatic | Raw FASTQ | Clean FASTQ |
| Assembly | MEGAHIT / metaSPAdes | Clean FASTQ | contigs FASTA |
| Assembly QC | QUAST | contigs FASTA | assembly report |
| Virus detection | VirSorter2 / geNomad / VirFinder / DeepVirFinder | contigs FASTA | viral candidates |
| Quality | CheckV | viral contigs FASTA | quality/completeness table |
| Dereplication | vClust / CD-HIT | viral FASTA | vOTU clusters |
| Taxonomy | vConTACT2 / geNomad / PhaBOX | viral FASTA / proteins | taxonomy table |
| Gene calling | Prodigal | viral FASTA | proteins / GFF |
| Annotation | DRAM-v / VIBRANT / eggNOG | viral FASTA / proteins | functional tables |
| Abundance | Bowtie2 / CoverM | reads + viral contigs | coverage table |
| Host prediction | iPHoP / WIsH / CRISPR BLAST | viral FASTA + host DB | host predictions |
| Phylogeny | MAFFT / IQ-TREE | marker genes | alignment / tree |
| Visualization | R / Python | tables | publication figures |
## Installation check
Rather than checking each environment by hand, run one script that reports every environment, core and viral tool versions, and database sizes. The book ships a ready-made version.
```{=html}
<div class="dl-row">
<a class="dl-btn" href="../scripts/check_viromics_installation.sh" download>⬇ check_viromics_installation.sh</a>
</div>
```
The core of that script is shown below; download the full copy above rather than retyping it.
```bash
cat > $VIROME/scripts/check_viromics_installation.sh << 'EOF'
#!/usr/bin/env bash
set -e

echo "Conda environments"
conda env list

echo "Core tools"
conda run -n viromics-core fastqc --version
conda run -n viromics-core fastp --version
conda run -n viromics-core megahit --version
conda run -n viromics-core spades.py --version
conda run -n viromics-core quast.py --version
conda run -n viromics-core seqkit version
conda run -n viromics-core bowtie2 --version | head -n 1
conda run -n viromics-core samtools --version | head -n 1
conda run -n viromics-core coverm --version

echo "Viral tools"
conda run -n virsorter2 virsorter --version || true
conda run -n genomad genomad --version || true
conda run -n checkv checkv -h | head -n 2 || true
conda run -n virfinder R -q -e "packageVersion('VirFinder')" || true
conda run -n vclust vclust --help | head -n 2 || true
conda run -n vcontact2 vcontact2 --help | head -n 2 || true
conda run -n vibrant VIBRANT_run.py -h | head -n 2 || true
conda run -n dramv DRAM.py --help | head -n 2 || true
conda run -n eggnog emapper.py --version || true
conda run -n iphop iphop --help | head -n 2 || true

echo "Database sizes"
du -sh $VIROME_DB/* 2>/dev/null || true
EOF

chmod +x $VIROME/scripts/check_viromics_installation.sh
bash $VIROME/scripts/check_viromics_installation.sh
```
::: {.time-storage}
**Estimated resources on 12 threads and 32 GB RAM:** the core environment usually installs in 20–60 minutes and 10–25 GB. Databases range from ~50 GB to more than 500 GB depending on the tools selected. CheckV and geNomad are moderate; DRAM and iPHoP are heavy.
:::
### Environment cheat sheet
Keep one short reference for which environment to activate for each task. A ready-made copy is included with the book.
```{=html}
<div class="dl-row">
<a class="dl-btn" href="../scripts/env_cheatsheet.txt" download>⬇ env_cheatsheet.txt</a>
</div>
```
```text
Core tools:              conda activate viromics-core
Virus identification:    conda activate virsorter2 | genomad | virfinder | deepvirfinder
Quality:                 conda activate checkv
Clustering:              conda activate vclust | cd-hit
Taxonomy:                conda activate vcontact2 | phabox | genomad
Functional annotation:   conda activate vibrant | dramv | eggnog
Host prediction:         conda activate iphop | wish
Main course folder:      cd $VIROME
Database folder:         cd $VIROME_DB
```
::: {.callout-warning}
## Common mistakes
- **Installing into `base`.** Never install viromics tools into the base conda environment. Always `mamba create -n toolname ...` then `conda activate toolname`.
- **Forgetting the database.** A tool without its database fails at runtime, not at install: VirSorter2 with no setup database, CheckV with `CHECKVDB` unset, geNomad with no `genomad_db`, VIBRANT with no `download-db.sh` run.
- **Mixing old and new tools in one environment.** DeepVirFinder, VirFinder, DRAM, VirSorter2, and PhaBOX have conflicting dependencies. Keep them separate so one upgrade cannot silently break another.
:::
::: {.callout-note collapse="true"}
## Exercise 1: build a `virome-test` environment
Create a throwaway environment called `virome-test` containing `fastqc`, `fastp`, `seqkit`, and `multiqc`, confirm each tool runs, then export the environment file.
**One solution:**
```bash
mamba create -n virome-test -y -c conda-forge -c bioconda \
  fastqc fastp seqkit multiqc

conda activate virome-test
fastqc --version
fastp --version
seqkit version
multiqc --version

conda env export --no-builds > $VIROME/env_yamls/virome-test.yml
```
:::
::: {.callout-note collapse="true"}
## Exercise 2: a `check_fastq_pairs.sh` guard script
Write a small script that verifies both paired-end FASTQ files exist before an analysis starts, and prints a clear message if either is missing.
**One solution:**
```bash
cat > $VIROME/scripts/check_fastq_pairs.sh << 'EOF'
#!/usr/bin/env bash
R1=$VIROME/raw_reads/samples_R1.fastq.gz
R2=$VIROME/raw_reads/samples_R2.fastq.gz

if [[ -f "$R1" && -f "$R2" ]]; then
  echo "FASTQ pair found:"
  echo "$R1"
  echo "$R2"
else
  echo "Missing FASTQ file. Check the raw_reads folder."
fi
EOF

chmod +x $VIROME/scripts/check_fastq_pairs.sh
bash $VIROME/scripts/check_fastq_pairs.sh
```
Guard scripts like this are worth writing once and reusing: they turn a confusing mid-pipeline crash into a one-line, human-readable error.
:::
## Key takeaways
::: {.key-takeaways}
- Keep one clean `viromics-core` environment for QC, assembly, and mapping, and give every complex viral tool its own isolated conda environment so incompatible dependencies never collide.
- Install with Miniforge and mamba, enabling the `conda-forge` and `bioconda` channels with strict channel priority for fast, reproducible solves.
- A tool is only half-installed until its database is in place: VirSorter2 [@guo2021virsorter2], geNomad [@camargo2024genomad], CheckV [@nayfach2021checkv], eggNOG-mapper [@cantalapiedra2021eggnogmapper], and iPHoP [@roux2023iphop] each need a separate download, and iPHoP and DRAM databases can each reach hundreds of GB.
- Store all databases in one central `$VIROME_DB` folder and persist paths such as `CHECKVDB` and `EGGNOG_DATA_DIR` in your shell profile so every step finds them.
- Export each environment with `conda env export --no-builds` and verify the whole stack with a single installation-check script before running any real analysis.
:::
## Further reading
- geNomad official documentation and GitHub for install, database download, and end-to-end usage [@camargo2024genomad]; project site: <https://github.com/apcamargo/genomad>.
- VirSorter2 for the multi-classifier setup and `virsorter setup` database step [@guo2021virsorter2].
- CheckV for how the quality database is built and consumed by the pipeline [@nayfach2021checkv].
- Bioconda channel configuration and package discovery, the backbone of every environment here [@shen2016seqkit].
## Chapter figure
{#fig-ch03 fig-alt="Linux viromics workstation with core and per-tool conda environments and a central databases folder"}
::: {.callout-tip collapse="true"}
## 🎨 Generate this figure
**Save as:** `images/ch03-workstation-setup.png` · **Aspect ratio:** 16:9 · **Style:** clean flat vector infographic, Codanics palette (teal `#008b8b`, navy `#05043b`, white background), no photorealism.
**Prompt:** Create a clean educational infographic of a Linux bioinformatics workstation set up for viromics. At the bottom, show a foundation layer labelled "Ubuntu" with a "Miniforge / mamba" installer and three stacked channel labels "conda-forge", "bioconda", "strict priority". Above it, draw a large clean box labelled "viromics-core (QC · assembly · mapping · R/Python)" next to a neat row of smaller isolated boxes labelled "virsorter2", "genomad", "checkv", "vclust", "vcontact2", "dramv", "eggnog", "iphop", "phabox", "wish", each drawn as a separate lab-bench station to emphasise isolation. On the right, show a folder tree icon for the project directory with sub-folders raw_reads, assemblies, viral_identification, checkv, taxonomy, host_prediction, visualization, and a highlighted central "databases" cylinder connected by arrows to several tool boxes. Add a small terminal window showing a green check mark labelled "installation check". Use teal and navy Codanics branding, clear sans-serif labels, and a tidy left-to-right, bottom-to-top flow.
:::
## Quiz: Linux Setup
**Q1. Why should tools be installed in separate environments?**
A. to avoid dependency conflicts
B. to increase read length
C. to remove viruses
D. to replace databases
::: {.callout-note collapse='true'}
**Answer:** A. Many viral tools require different dependency versions.
:::
**Q2. Which database variable is commonly set for CheckV?**
A. CHECKVDB
B. FASTQDB
C. TREEPATH
D. PHAGEDIR
::: {.callout-note collapse='true'}
**Answer:** A. CheckV needs a database path.
:::
**Q3. Which command exports a conda environment?**
A. conda env export --no-builds
B. conda delete all
C. mamba tree
D. fastqc export
::: {.callout-note collapse='true'}
**Answer:** A. Environment export improves reproducibility.
:::
**Q4. Which environment should run FastQC and MEGAHIT in this book?**
A. viromics-core
B. checkv
C. iphop
D. wish
::: {.callout-note collapse='true'}
**Answer:** A. The core environment contains general pipeline tools.
:::
**Q5. Why are databases stored in a central folder?**
A. to document and reuse large data
B. to delete outputs
C. to trim reads
D. to make the CPU faster
::: {.callout-note collapse='true'}
**Answer:** A. Database paths must be documented for reproducibility.
:::
## Interactive quiz: Linux setup
```{=html}
<div class="interactive-quiz-note"><strong>How to use this quiz:</strong> Select one option, click <em>Check answer</em>, and read the explanation. Use the reset button if you want to try again.</div>
<div class="quiz-set">
<div class="quiz-question" data-answer="B">
<p class="quiz-prompt">1. What is the main advantage of mamba over conda for large bioinformatics installs?</p>
<label class="quiz-option"><input type="radio" name="03-linux-setup-q1" value="A"> <strong>A.</strong> It performs microscopy</label>
<label class="quiz-option"><input type="radio" name="03-linux-setup-q1" value="B"> <strong>B.</strong> It solves environments faster</label>
<label class="quiz-option"><input type="radio" name="03-linux-setup-q1" value="C"> <strong>C.</strong> It replaces FASTQ files</label>
<label class="quiz-option"><input type="radio" name="03-linux-setup-q1" value="D"> <strong>D.</strong> It only works on Windows</label>
<div class="quiz-controls"><button type="button" class="quiz-check">Check answer</button><button type="button" class="quiz-reset">Reset</button></div>
<div class="quiz-explanation">Mamba is widely used because it resolves complex environments faster than standard conda in many cases.</div>
<div class="quiz-feedback"></div>
</div>
<div class="quiz-question" data-answer="A">
<p class="quiz-prompt">2. Why is Bioconda important for this book?</p>
<label class="quiz-option"><input type="radio" name="03-linux-setup-q2" value="A"> <strong>A.</strong> It is a major package source for bioinformatics tools</label>
<label class="quiz-option"><input type="radio" name="03-linux-setup-q2" value="B"> <strong>B.</strong> It is a sequence aligner</label>
<label class="quiz-option"><input type="radio" name="03-linux-setup-q2" value="C"> <strong>C.</strong> It removes adapters automatically</label>
<label class="quiz-option"><input type="radio" name="03-linux-setup-q2" value="D"> <strong>D.</strong> It is a file format</label>
<div class="quiz-controls"><button type="button" class="quiz-check">Check answer</button><button type="button" class="quiz-reset">Reset</button></div>
<div class="quiz-explanation">Bioconda provides many of the tools used in viromics workflows, including assembly, QC, annotation, and taxonomy software.</div>
<div class="quiz-feedback"></div>
</div>
<div class="quiz-question" data-answer="B">
<p class="quiz-prompt">3. What is the best reason to separate environments by tool group?</p>
<label class="quiz-option"><input type="radio" name="03-linux-setup-q3" value="A"> <strong>A.</strong> It guarantees zero bugs forever</label>
<label class="quiz-option"><input type="radio" name="03-linux-setup-q3" value="B"> <strong>B.</strong> It reduces dependency conflicts</label>
<label class="quiz-option"><input type="radio" name="03-linux-setup-q3" value="C"> <strong>C.</strong> It increases read length</label>
<label class="quiz-option"><input type="radio" name="03-linux-setup-q3" value="D"> <strong>D.</strong> It eliminates the need for databases</label>
<div class="quiz-controls"><button type="button" class="quiz-check">Check answer</button><button type="button" class="quiz-reset">Reset</button></div>
<div class="quiz-explanation">Some viromics tools have heavy or incompatible dependencies. Separate environments make the setup more stable and easier to maintain.</div>
<div class="quiz-feedback"></div>
</div>
<div class="quiz-question" data-answer="B">
<p class="quiz-prompt">4. Which file is most useful for recreating an environment on another machine?</p>
<label class="quiz-option"><input type="radio" name="03-linux-setup-q4" value="A"> <strong>A.</strong> README only</label>
<label class="quiz-option"><input type="radio" name="03-linux-setup-q4" value="B"> <strong>B.</strong> environment.yml export</label>
<label class="quiz-option"><input type="radio" name="03-linux-setup-q4" value="C"> <strong>C.</strong> PNG image</label>
<label class="quiz-option"><input type="radio" name="03-linux-setup-q4" value="D"> <strong>D.</strong> BAM index only</label>
<div class="quiz-controls"><button type="button" class="quiz-check">Check answer</button><button type="button" class="quiz-reset">Reset</button></div>
<div class="quiz-explanation">An exported environment file documents packages and versions and makes the setup more reproducible.</div>
<div class="quiz-feedback"></div>
</div>
<div class="quiz-question" data-answer="A">
<p class="quiz-prompt">5. Why should databases be organized carefully?</p>
<label class="quiz-option"><input type="radio" name="03-linux-setup-q5" value="A"> <strong>A.</strong> They are often large and multiple tools need fixed paths</label>
<label class="quiz-option"><input type="radio" name="03-linux-setup-q5" value="B"> <strong>B.</strong> They only matter for plotting</label>
<label class="quiz-option"><input type="radio" name="03-linux-setup-q5" value="C"> <strong>C.</strong> They are always included in FASTQ files</label>
<label class="quiz-option"><input type="radio" name="03-linux-setup-q5" value="D"> <strong>D.</strong> They remove the need for citations</label>
<div class="quiz-controls"><button type="button" class="quiz-check">Check answer</button><button type="button" class="quiz-reset">Reset</button></div>
<div class="quiz-explanation">Viromics databases can be large, tool-specific, and path-sensitive. A clear layout prevents many downstream errors.</div>
<div class="quiz-feedback"></div>
</div>
</div>
```
